Whole-House Remodel and Addition Checklist: From First Idea to Final Walkthrough
By the JDI Construction teamUpdated November 20264 min read
Decide what the project really is, set a budget range, check the rules for your address, choose a delivery model and vet contractors, then hold a consultation and compare itemized estimates. Before construction, sign a written contract, file the property tax exemption notice, settle lead and asbestos testing and where you will live. Then come permits, construction, inspections and the final walkthrough.
A whole-house remodel or an addition has more steps than any single-room project, and the order matters. Some decisions are cheap to change early and expensive later; some paperwork has to be filed before work starts or not at all. This checklist puts the steps in order and points to the page that covers each one in depth, so you can see the whole path before you take the first step.
Stage 1: Decide what the project is
- List what is not working. Rooms, layout, systems, space, accessibility. Note what you want the house to do in five or ten years.
- Decide the size of the job. A few rooms, the whole house, an addition, or a separate unit. Our page on the signs a house needs a whole-house remodel helps with this.
- If you need space, compare adding on with moving. See adding on or moving in Clark County.
- Decide one build or phases. See all at once or room by room.
Stage 2: Set the budget
- Get a planning range. JDI's whole-home cost calculator and our post on whole-house remodel cost in Vancouver give published ranges by home size and finish level.
- Add the costs outside the contract. Sales tax on the full contract price, permit fees, impact fees for a new unit, temporary housing and a contingency. See paying for a whole-house remodel.
- Talk to lenders early if you will borrow, so the design fits what you can finance.
Stage 3: Check the rules for your address
- Find out who issues your permits. The City of Vancouver inside its limits, Clark County in unincorporated areas, and each other city for its own homes. See the City of Vancouver permit process and permits outside city limits.
- For an addition, read home addition permits in Vancouver: setbacks, lot coverage, engineering and energy code.
- For an ADU, read ADU rules in Vancouver.
- For a house in Oregon, the rules and the contractor licensing are different; start with hiring a contractor in Portland, OR.
Stage 4: Choose how and who
- Pick a delivery model. One design-build firm, or an architect followed by a builder. See design-build or architect plus contractor.
- Vet the companies. Look up each contractor's Washington registration (see Washington contractor registration), check finished whole-house work and call references. Our contractor checklist has the full list.
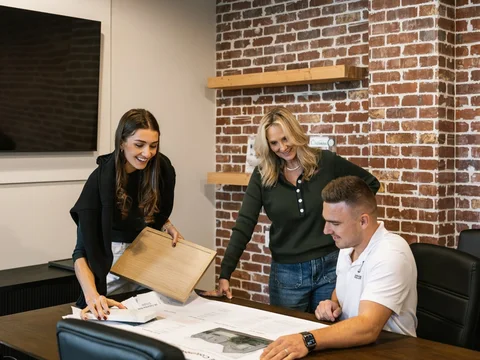
- Hold the consultations. Bring a survey, existing plans, photos and your budget range. See your first consultation.
- Compare estimates line by line. Same scope, every allowance in dollars, sales tax and permit fees shown. See comparing estimates.
Stage 5: Design and paperwork before construction
- Finish the design and selections before construction starts. Changes made on paper cost far less than changes made on site.
- Sign a written contract that states the price including sales tax, payment terms, permit fees, the specific work, materials, warranties and the change-order process, as L&I recommends. See contracts, deposits and change orders.
- Understand lien releases before the first payment. See Washington lien law.
- File the property tax exemption notice with the county assessor before the improvement is made (RCW 84.36.400). See property tax and remodeling.
- Settle testing in an older home. EPA says homes built before 1978 are more likely to have lead-based paint, and the Southwest Clean Air Agency requires the owner or the owner's agent to check the work area for suspect asbestos materials before renovation. See lead paint rules and asbestos rules.
- Decide where you will live during each stretch of the work. See living at home during a remodel.
Stage 6: Construction
- Permits issued, materials ordered and a start date set.
- Pre-construction meeting to agree on access, working hours, protection and how you will get updates.
- Demolition and discovery. Hidden problems found now are priced and approved by written change order before the work is done.
- Framing and rough-ins, then the inspections that must pass before walls close.
- Finishes, from drywall and cabinets to flooring, tile, fixtures and paint.
Our post on a whole-house remodel, phase by phase explains what happens in each of these stages.
Stage 7: Finish and afterward
- Final inspections and permit sign-off.
- Final walkthrough against the contract, with a written list of anything left to finish.
- Collect the paperwork: warranty, product documentation, lien releases and the final permit records. JDI's is a 5-year written workmanship warranty; see our warranty page.
- If something goes wrong, see what to do if something goes wrong.
When this checklist is more than you need
If the project is one kitchen or one bathroom, our kitchen and bathroom guides have shorter checklists built for single rooms. If the work is cosmetic, such as paint and flooring with no walls or systems changing, many of these steps do not apply.
Next step
The step that turns this checklist into a plan for your house is the first consultation. See what to bring to your first consultation and what happens there.
Common questions
What is the first step in planning a whole-house remodel?
Write down what is not working and what you want the house to do in five or ten years. That list decides whether you need a whole-house remodel, a few rooms, an addition, or a move, and it is the brief every designer and contractor will work from.
How far ahead should I start planning?
Design and permits come before construction, so start well before you want work to begin. JDI's calculator gives on-site times of 4 to 7 months for a standard whole-home refresh and 7 to 14 months for larger homes or projects with an addition, and those times start after design and permits.
What paperwork should I have before work starts?
A signed, itemized contract, the contractor's registration number, the permits, a written change-order process, the asbestos survey results for the work area, and, if you are using it, proof that you filed the property tax exemption notice with the county assessor.
What should happen at the final walkthrough?
You and the contractor go through every room against the contract, list anything that still needs finishing, and agree when it will be done. You should also receive warranty information and documentation for the products installed.
- City of Vancouver: Residential building permits
- WA L&I: Hire smart, step by step
- RCW 84.36.400: Improvements to single-family dwellings (property tax exemption)
- Southwest Clean Air Agency: SWCAA 476 Standards for Asbestos Control, Demolition and Renovation
- US EPA: Protect your family from sources of lead
Checked November 2026. Rules, fees and programs change; confirm the current requirement with the agency before you rely on it.
Keep going
- Decide · Choosing who builds itYour First Whole-House, Addition or ADU Consultation: What to Bring and What HappensWhat to bring to a first whole-house, addition or ADU consultation with JDI in Vancouver or Portland, what we talk about, and what happens after the visit.
- Compare · Whole houseA whole-house remodel, phase by phaseEach phase from first call to final walkthrough.
- Decide · CostHow much does a whole-house remodel cost?JDI's ranges by home size and finish level, add-ons, sales tax and permits.
- Your protectionsCheck a contractor's Washington registrationHow to look up a contractor with L&I before you sign.