Bathroom Tile Patterns: Stacked, Offset, Herringbone and More
By the JDI Construction teamReviewed by Arthur Kulchitskiy, Project Consultant, and Denise Lacquement, Designer (bathroom specialist)Updated October 20265 min read
Pick the pattern for the tile size and the room. Stacked and one-third offset layouts suit long tiles; ANSI A108.02 limits the offset to 33 percent when the offset side is over 15 inches unless the maker allows more. Herringbone and chevron add movement but more cuts, waste and labor. A good layout is planned around the niche, valve and drain before tile is ordered.
The same tile can look plain, classic or striking depending on how it is laid. Pattern also changes the work: how many cuts there are, how much tile is wasted, and whether the tile's own shape allows it at all. This page compares the common bathroom patterns and explains how a good layout is planned around a niche, a valve and a drain.
The common patterns compared
| Pattern | The look | Suits | Waste | Labor |
|---|---|---|---|---|
| Straight stack (grid) | Clean, modern, architectural | Square tiles, rectified tile, large format | Lowest | Lower, but shows any misalignment |
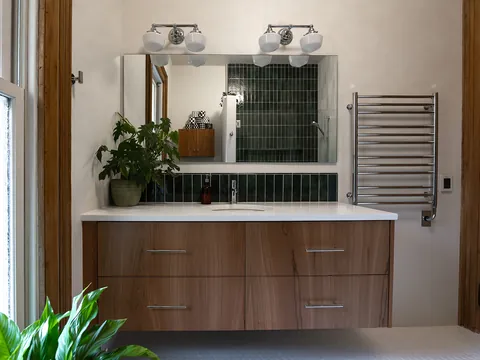
| Vertical stack | Draws the eye up, makes ceilings feel taller | Long narrow tile on walls | Low | Lower |
| Half offset (running bond) | Classic brick or subway look | Short tiles such as 3 by 6 subway | Low to moderate | Standard |
| One-third offset | Softer stagger, less obvious stepping | Long tile over 15 inches on a side | Low to moderate | Standard |
| Herringbone | Movement, traditional or tailored | Rectangles, often 2 by 8 to 4 by 16 | High | High |
| Chevron | Sharp zigzag, more graphic than herringbone | Tile made with angled ends | High | High |
| Basketweave | Vintage, woven | Small mosaics, often on mesh sheets | Moderate | Moderate |
| Hexagon | Vintage or modern, depending on size | Floors and shower floors, mosaics | Moderate | Moderate; edges need many cuts |
| Diagonal (on point) | Square tiles turned 45 degrees | Floors in older-style rooms | High | Higher |
Mosaics on mesh sheets come with the pattern built in, which makes complex looks like basketweave, penny rounds or small hex practical on a shower floor.
The offset rule for long tile
Half-offset brick is the pattern most people picture, and it is the one most often misused with long tile. Long tiles are rarely perfectly flat; most have a slight bow. In a half offset, the high middle of one tile lines up with the low ends of the tiles beside it, which makes the edges step.
The tile industry's workmanship standard, ANSI A108.02, addresses this in section 4.3.8.2. For running bond and other offset patterns where the side being offset is greater than 15 inches, the offset should be a maximum of 33 percent unless the tile maker specifies otherwise. If more than 33 percent is specified, the specifier and owner must approve a mock-up and the lippage. Some older guidance used 18 inches; the current wording uses 15.
So with a 12 by 24 or 8 by 48 tile, plan on a one-third offset or a straight stack unless the maker's instructions say a half offset is fine. Flatness and lippage are covered in more depth on large-format and slab tile.
Planning the layout around the bathroom
Pattern is only half the plan. The other half is where the pattern starts and how it meets everything else in the room. A good layout is drawn before tile is ordered.
Start from what people see
Center the layout on the most visible wall or the view from the door, not the corner where the installer happens to start. A row of full tiles at the shower entry or across the vanity wall looks deliberate. The cut rows go where they are least visible, often behind the door or under the vanity toe kick.
Avoid slivers
A thin strip of tile at a wall or ceiling looks like a mistake and is fragile. Shifting the starting line by half a tile usually leaves balanced cuts at both ends. This matters most in narrow bathrooms and with large tile.
Size the niche to the tile
Ideally, the niche's top, bottom and sides fall on grout lines, so the niche looks built into the pattern rather than cut out of it. That means the niche framing is set after the tile is chosen. See shower niches and benches.
Plan the valve, showerhead and grab bars
Valve trims and showerhead arms look right centered on a tile or a joint, not near an edge. Grab bar blocking should be in the wall before tile, and the bar placement should land on solid tile, not a grout line; see grab bars and safety hardware.
Mind the shower floor slope
Center-drain shower floors slope in four directions, which suits small mosaics and hex. Herringbone or large tile on a sloped floor usually works only with a linear drain and a single slope plane.
Decide the transitions
Where floor tile meets the shower, where wall tile stops short of the ceiling, and how edges are finished (bullnose, metal profile or a full-height wall) all affect the look. Choose the trim with the tile.
Waste, in words
How much extra tile to order depends on the pattern more than anything else. Straight stack and vertical stack waste the least. Offset layouts waste a little more at the ends of rows. Herringbone, chevron and diagonal layouts waste the most, because every edge piece is an angled cut and offcuts are often too small to reuse. Small bathrooms waste a larger share whatever the pattern, since much of the area is cuts. Ask the installer to calculate the overage from the actual layout, and keep a spare box.
Mixing patterns and sizes
Bathrooms often use two or three patterns: a large tile on the floor, a different format on the shower walls, and a mosaic on the shower floor. That is fine when one element leads and the others support it. A few guidelines designers use (rules of thumb, not standards):
- Let one pattern be the feature. A herringbone floor reads better with quiet stacked walls.
- Keep the color family close when patterns change, or change the color and keep the pattern simple.
- Use the shower floor mosaic as a quieter echo of the main tile, not a new idea.
- Repeat a grout color across surfaces so the room holds together; see tile and grout color pairings.
Who should choose which
- Stacked or vertical stack: modern rooms, large or rectified tile, small rooms that need calm.
- Half offset: classic subway tile and short formats.
- One-third offset: long tile where you want a staggered look.
- Herringbone or chevron: a single feature surface, such as the floor or one shower wall, when the budget allows for extra labor and waste.
- Hex and basketweave mosaics: shower floors and older-style bathrooms.
Complex patterns cost more to install. In JDI's published planning ranges, a custom tile pattern or inlay is an add-on of $3,000-$9,000, and it is shown with the other add-ons on our bathroom remodel cost guide. Our 3D design layout shows the pattern on your actual walls before anything is ordered, and it is part of every bathroom remodel we design in Vancouver.
Common questions
Which tile pattern makes a small bathroom look bigger?
Simple patterns with fewer lines tend to help: larger tiles, a vertical stack on the walls to draw the eye up, or tile run continuously from the floor into the shower. Busy patterns in a small room can feel crowded. Grout close to the tile color also helps the surface read as one plane.
Can I use a half offset with 12 by 24 tile?
Only if the tile maker allows it. The 24-inch side is over 15 inches, so ANSI A108.02 limits the offset to 33 percent unless the maker specifies otherwise. A half offset on long tile tends to show lippage because of slight bowing in the tile.
Does a herringbone floor cost more to install?
Yes, as a rule. Every edge piece is an angled cut, the layout takes longer to set out, and more tile is wasted. JDI prices a custom tile pattern or inlay as an add-on with a planning range of $3,000-$9,000, depending on the size and complexity.
Should the floor and wall grout lines line up?
Where the same size tile runs from floor to wall, lining them up looks deliberate and clean. With different tile sizes it is rarely possible everywhere, so designers pick the most visible wall to align and let the others fall. Decide this before installation starts.
- Tile Council of North America: ANSI standards list (A108.02 workmanship, 2023)
- Tile Council of North America: Lippage FAQ
- Tile Council of North America: 2026 Tile Initiative (large format tile certification at 15 inches)
Checked October 2026. Rules, fees and programs change; confirm the current requirement with the agency before you rely on it.
Keep going
- JDI ConstructionBathroom remodeling in Vancouver, WAOur bathroom remodeling service, recent projects and what to expect.
- Planning · Tile, floors and walls in depthGrout for Bathrooms: Cement, Urethane and EpoxyBathroom grout compared: standard and high-performance cement, epoxy, pre-mixed and urethane, joint widths, sealing, mildew in damp Vancouver and color.
- Exploring · Tile, floors and walls in depthBathroom Flooring Options: Tile, LVP, Sheet Vinyl and WoodBathroom flooring compared: tile, stone, luxury vinyl plank, sheet vinyl and wood. Water tolerance, slip, comfort, subfloor needs and old vinyl cautions.
- Exploring · Tile, floors and walls in depthHeated Bathroom Floors: Mats, Cables and ControlsElectric heated bathroom floors: mats vs loose cable, UL 2683 listing, ground-fault protection, thermostats and floor sensors, and which floors work.