Kitchen Backsplashes and Wall Finishes
By the JDI Construction teamReviewed by Arthur Kulchitskiy, CEOUpdated October 20266 min read
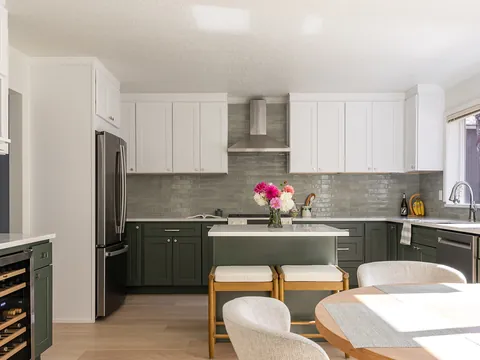
Choose the backsplash after the countertop and cabinets are fixed, and install it after the countertop is in. Decide the material, how high it runs, where it stops at open ends, and where the outlets fall before the electrical rough-in. Porcelain and ceramic tile are the easiest to live with, and a slab backsplash has the fewest joints to clean.
The backsplash is a small area that gets a lot of attention, both from you and from grease, steam and water. It is also one of the last things installed, which tempts people to leave the decisions until late. Several of them, especially height and outlet placement, have to be made before the walls are closed.
Tile types compared
| Material | Character | Upkeep | Things to know |
|---|---|---|---|
| Glazed ceramic | The widest range of colors, sizes and shapes, including classic subway tile | Low. The glaze wipes clean. | Easy to cut, so it handles outlets and odd corners well. |
| Porcelain | Dense and hard, available in stone, concrete and marble looks, and in large formats | Low | Harder to cut. Large tiles need a flat wall. |
| Glass | Reflective, bright, good in a dark kitchen | Low, though it shows water spots and smears | Shows the adhesive behind it, so installation has to be clean. Chips at cut edges. |
| Natural stone (marble, travertine, slate) | Variation no manufactured tile matches | Higher. Needs sealing and can stain or etch. | Think carefully before using it behind a range or sink. |
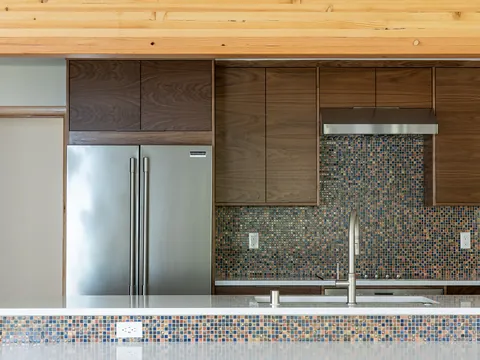
| Handmade and zellige-style tile | Irregular surface and edges, a lot of texture and reflection | Moderate. More grout and an uneven face to wipe. | Order extra, and expect variation from piece to piece. |
| Slab (quartz, stone or porcelain) | One continuous surface with no grout lines | Lowest | Fabricated and installed by the countertop company. Outlet cutouts must be exact. |
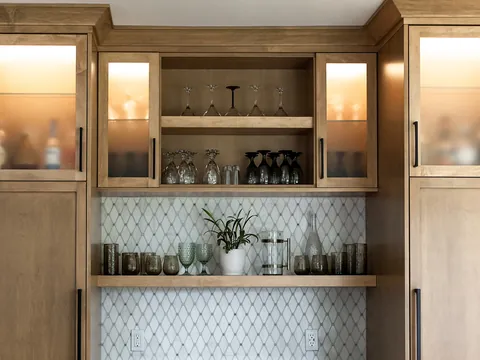
Pattern matters as much as material. The same rectangular tile reads very differently stacked, offset in a brick pattern, set vertically or laid in a herringbone. Patterns with many cuts take longer to set and use more tile. For current looks, see our articles on which kitchen backsplashes are in style, neutral backsplash ideas and herringbone backsplashes.
Slab backsplashes
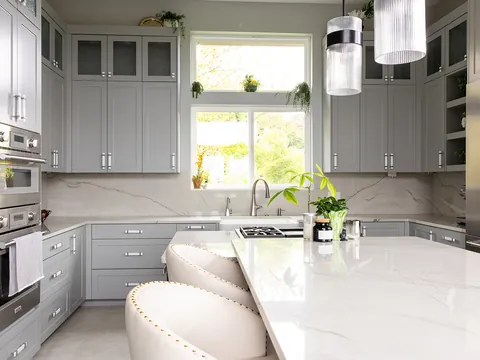
Running the countertop material up the wall gives a clean surface with nothing to scrub but the joint at the counter. It suits strongly veined stone, where tile would compete, and it is the easiest backsplash to keep clean behind a range.
The trade-offs are cost and precision. A slab backsplash is templated after the countertops are set, uses a meaningful amount of extra material, and every outlet, switch and window return has to be cut exactly. Long walls will have a seam. In JDI Construction's published planning ranges, a quartz or stone slab backsplash adds $3,000-$8,000 to a kitchen project before sales tax. That is a planning range, not a quote. Slab choices are covered in choosing kitchen countertops.
Height and where it stops
Three decisions here, and each should be drawn on the elevations before tile is ordered.
How high
- Counter to upper cabinets. The standard. Tile fills the space between countertop and the underside of the wall cabinets.
- Full height. Tile or slab runs to the ceiling on walls with no upper cabinets, around a window or behind open shelves. It looks finished and needs more material and labor.
- Behind the range and hood. Tile usually continues up to the underside of the hood, and to the ceiling beside a chimney-style hood.
Where it ends
The awkward spots are open ends, where a counter run stops without a wall or tall cabinet to finish against. Good stopping points are the outside edge of the upper cabinet above, the edge of the countertop, or an inside corner. Whatever you choose, line the tile edge up with something. An edge that stops between two reference lines looks like a mistake.
How the edge is finished
Exposed tile edges need a finish: a bullnose or trim tile from the same line, a metal edge profile, or a mitered or polished edge on stone. Not every tile line offers trim pieces, so check before you fall for a tile. Where tile meets the countertop, the joint is filled with flexible caulk matched to the grout, not with grout, because the counter and wall move slightly against each other.
Outlets in the backsplash
Receptacles are the detail that most often spoils a carefully chosen backsplash. Their positions are fixed at electrical rough-in, long before tile, and the electrical code sets where they have to be.
Within those limits you have real choices:
- Set them low and horizontal, just above the counter, so they sit in the bottom course of tile and are hidden by whatever is on the counter.
- Mount them under the upper cabinets, using angled strips or boxes at the underside of the cabinet, provided they are within 20 inches of the counter. This leaves the backsplash unbroken.
- Match the color. Devices and cover plates come in many finishes, and a plate close to the tile color recedes.
- Align them with the tile layout, centering each one on a tile or a grout line. This takes coordination between the electrician and the tile setter, and it is worth asking for.
Switches for the disposal and under-cabinet lights need the same thought. The kitchen electrical code page explains spacing, ground-fault protection and what a remodel triggers. Under-cabinet lights rake across tile and show every uneven edge, so plan them together.
Grout and maintenance
Grout is where a backsplash gets dirty. Reduce it or upgrade it.
- Joint size. Larger tiles and tighter joints mean less grout. Handmade tile needs wider joints to absorb its irregularity.
- Grout type. Cement grout is standard and should be sealed. Epoxy and other high-performance grouts resist stains far better and cost more to install. They are worth considering behind the range.
- Color. Mid-tone grout hides more than white. Contrasting grout emphasizes the pattern and shows every uneven line.
- Sealing. Natural stone and cement grout need sealing on the schedule the product maker gives. Glazed ceramic, porcelain and glass do not.
For day-to-day care, wipe splashes while they are fresh and use cleaners suited to the material. Acidic cleaners etch marble and can degrade cement grout.
Order of installation
- Rough-in. Receptacle and switch boxes are set at the planned heights, and any wall blocking goes in.
- Wallboard and cabinets. Walls are closed, patched flat and primed. Cabinets are installed.
- Countertops. Templated after cabinets are set, then fabricated and installed.
- Backsplash. Tile is set on top of the finished counter, or the slab backsplash is templated and installed.
- Grout, caulk and seal.
- Electrical trim. Receptacles are brought forward flush with the new surface and cover plates fitted.
- Final paint touch-up.
Order tile early even though it goes in late. A back-ordered tile or a short box count can hold up the finish of an otherwise complete kitchen. Order extra for cuts and breakage, in the quantity your tile setter recommends, because a later batch may not match.
Other wall finishes
Painted walls in a kitchen should be washable. Satin and semi-gloss finishes clean more easily than flat paint, at the cost of showing surface flaws, so wall preparation matters. Use a paint formulated for kitchens and baths near the sink and range.
Wood paneling, beadboard and wallpaper all work away from heat and water. Keep them out of the area behind and above the cooktop. The residential code requires at least 30 inches of vertical clearance from the cooking top to unprotected combustible material (IRC M1901.1), and the range and hood instructions set the side and rear clearances. Those are covered in range hoods and ventilation.
Next steps
Before you shop, read what to know before buying a kitchen backsplash. JDI Construction draws the backsplash, tile layout and outlet positions into the design so the electrician and tile setter work from the same plan. See how we approach kitchen remodeling in Vancouver.
Common questions
Can I tile over an existing backsplash?
Sometimes, if the old tile is sound, flat and well bonded, but it adds thickness that shows at the edges and leaves outlets recessed. Removing the old tile usually damages the drywall behind it, so plan for new wallboard in that area. In a home built before 1978, read the lead and asbestos pages in this guide before any demolition.
Do I need a permit to replace a backsplash in Vancouver?
Vancouver's code exempts painting, papering and similar finish work from a building permit (VMC 17.08.090(D)(1)(c)). Tile is not named, so treating a backsplash as similar finish work is an interpretation and the Permit Center can confirm it at 360-487-7833. Adding or moving receptacles is electrical work that needs its own permit.
Should the backsplash match the countertop?
It can, by running the same slab up the wall, which gives a calm, continuous look. More often one of the two is the feature and the other is quiet: a strongly veined counter with plain tile, or a plain counter with patterned tile. Bring a countertop sample when you choose tile and look at both in the kitchen's own light.
Is a 4-inch backsplash strip still a good option?
A short strip of countertop material protects the joint at the wall and costs less than tiling the whole area, but it leaves painted wall exposed to splashes behind the sink and range. Most remodels now run the backsplash from the counter to the underside of the upper cabinets.
How long after countertops can the backsplash go in?
It follows the countertop installation, since the tile sits on top of the finished counter. This guide does not give a number of days, because it depends on your fabricator and tile setter. Ask your contractor to show the backsplash as its own step on the schedule.
- Vancouver Municipal Code 17.08.090: permits required and exempt work
- WAC 296-46B-010: adoption of the National Electrical Code in Washington
- 2021 Washington State Residential Code, Chapter 19, cooking appliance clearances (code text hosted by UpCodes)
Checked October 2026. Rules, fees and programs change; confirm the current requirement with the agency before you rely on it.
Keep going
- Exploring · Countertops, backsplashes and floors in depthBacksplash Tile Materials Compared: Ceramic, Porcelain, Glass, Stone and ZelligeBacksplash tile materials compared for a kitchen: ceramic, porcelain, glass, natural stone and zellige, with care, cutting difficulty and relative cost.
- Exploring · Countertops, backsplashes and floors in depthGrout for Kitchen Tile: Cement, Epoxy and Urethane, Plus Joint Width and ColourKitchen tile grout explained: cement, high-performance cement, epoxy and premixed grouts, sanded versus unsanded, joint width, sealing, color and caulk joints.
- Exploring · Color and style guidesBacksplash and Grout Colors: Tying the Kitchen TogetherHow to choose backsplash and grout colors: matching or contrasting the countertop, reading undertones, and how grout color changes the look of the tile.
- JDI ConstructionKitchen remodeling in Vancouver, WAOur kitchen remodeling service, recent projects and what to expect.
- Exploring · Plan your kitchenWhere to Start With a Kitchen Remodel in Vancouver, WAThe first decisions in a Vancouver, WA kitchen remodel, in order: goals, scope, budget range, who to call, what to measure and when permits come in.
- Exploring · Plan your kitchenRefresh, Pull-and-Replace or Full Gut: Kitchen Remodel Levels ExplainedFour kitchen remodel levels compared for Vancouver, WA homes: what each includes, what triggers a permit, how the cost relates and who each one suits.