Kitchen Lighting: Layers, Placement and What the Energy Code Expects
By the JDI Construction teamReviewed by Arthur Kulchitskiy, CEOUpdated October 20266 min read
Plan kitchen lighting in three layers: ambient light for the room, task light on every work surface, and accent light for depth, each on its own dimmer. Washington's residential energy code requires new permanently installed lighting in an alteration to use only high-efficacy sources. Lighting is designed before drywall because the wiring, boxes and switches all go in while the walls and ceiling are open.
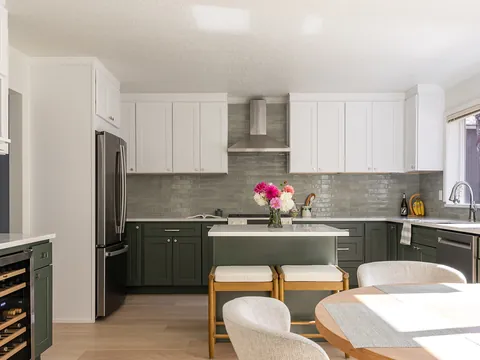
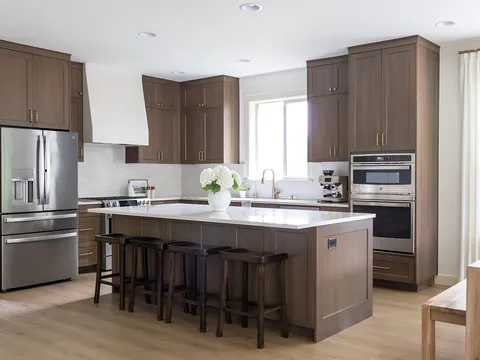
Most disappointing kitchens are lit by a grid of ceiling lights and nothing else. The room is bright, yet the counters are in shadow because the cook stands between the light and the work. Good kitchen lighting comes from several sources doing different jobs, and it has to be planned early, since every fixture needs a wire, a box and a switch that go in before the walls are closed.
The three layers
| Layer | Its job | Typical fixtures | Control |
|---|---|---|---|
| Ambient | General light to move around the room safely | Recessed downlights, flush or semi-flush ceiling fixtures, cove lighting | Its own dimmer |
| Task | Strong, shadow-free light on counters, sink, range and island | Under-cabinet strips, pendants, recessed lights aimed at work surfaces, the hood light | Separate dimmers by zone |
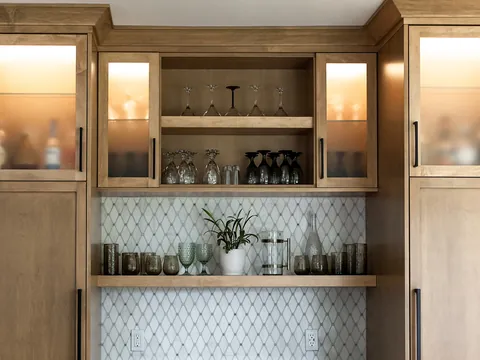
| Accent | Depth and mood; a low light level for evenings | In-cabinet and glass-door lighting, toe-kick strips, above-cabinet light, wall sconces | Separate switch or dimmer |
The National Kitchen & Bath Association's planning guidelines put it simply: every work surface should be well illuminated by appropriate task lighting. That is a design guideline, not code, but it is the right test. Stand at each place you chop, wash or cook in the plan and ask where the light comes from.
Recessed lights: placement over spacing
There is no single correct spacing for recessed lights, because it depends on ceiling height, the beam angle of the fixture and its output. Placement matters more than count.
- Light the counters, not the aisle. A downlight centered in the walkway puts your shadow on the counter. Position perimeter downlights roughly above the front edge of the countertop so the light falls in front of you.
- Lay out from the work surfaces. Place lights over the sink, the main prep area and the island first, then fill in the room. A layout that starts as an even grid on the ceiling usually ends up lighting the floor.
- Watch the upper cabinets. A light too close to the wall is partly blocked by the cabinet or crown molding and throws a scallop of glare on the doors.
- Fewer, better fixtures. A ceiling crowded with cans looks busy. Under-cabinet lighting does the task work, which lets the ceiling carry less.
Under-cabinet lighting
If the budget allows only one upgrade, make it this one. Under-cabinet light puts illumination exactly where you work, with nothing to cast a shadow. Continuous LED strip or linear bars give more even light than separate pucks, which leave bright spots and dark gaps.
Details that separate a good installation from a poor one:
- Mount the light toward the front of the cabinet, behind a small rail or recess, so it lights the counter and you do not see the source.
- On a polished countertop, bare LED points reflect as a row of dots. A diffuser lens or a channel fixes that.
- Decide where the driver or transformer lives. It needs an accessible location, often inside a cabinet.
- Hardwire it to a wall dimmer. Plug-in kits mean visible cords and a wasted outlet.
Under-cabinet lighting has to be coordinated with the cabinet order, since some lines offer a built-in light rail or routed channel, and with the backsplash, since wire locations are fixed before tile goes up.
Pendants over islands and peninsulas
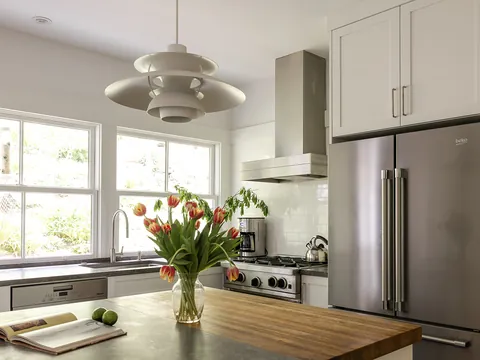
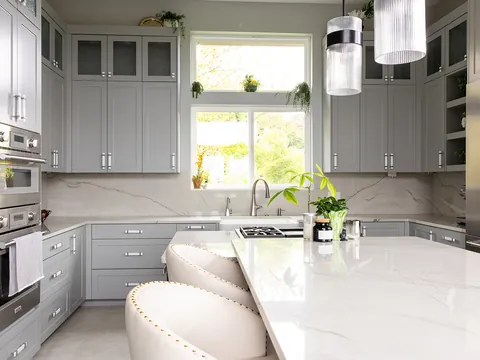
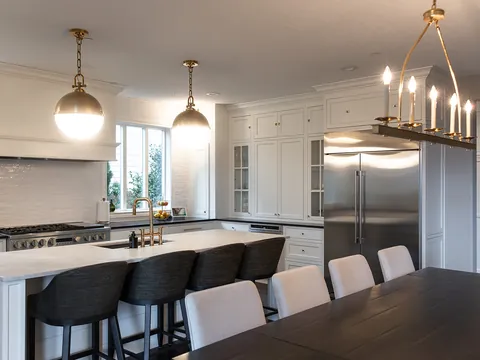
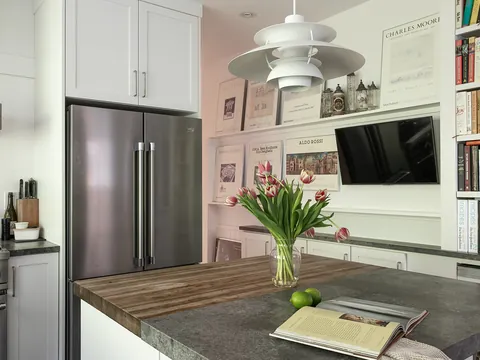
Pendants are task lights that also happen to be the most visible fixtures in the room. A common starting point is to hang them so the bottom sits about 30 to 36 inches above the countertop, then adjust for the height of the people in the house and the sightline across the room. That figure is a designer's convention, not a rule.
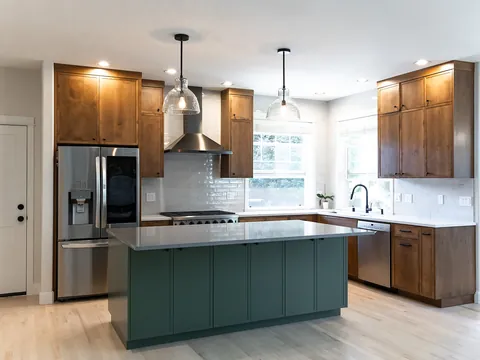
Two or three pendants are typical. Space them evenly along the island and keep them inside its ends so nobody walks into one. Pendants alone seldom light a large island evenly, so many plans pair them with a few recessed lights on a separate dimmer. Ceiling boxes for pendants are set during rough-in, so the island's final position has to be fixed first; see kitchen islands.
Dimming and switching
Put each layer on its own control. A kitchen at full brightness for cooking and the same kitchen at ten percent for a late glass of water are different rooms, and dimmers are what make one space do both. Practical points:
- Not every LED dims well with every dimmer. Have your electrician match the dimmer to the fixtures, and test one before all are installed, to avoid flicker and buzzing.
- Put switches at each entrance to the kitchen, grouped in a logical order.
Color temperature
Color temperature is measured in kelvin (K). Lower numbers are warmer and more yellow, higher numbers cooler and bluer. Most homes look right with warm white, around 2700K to 3000K, in the kitchen. Something near 3500K to 4000K reads as neutral and crisper. What matters most is consistency: use the same color temperature for every fixture in the room and in the rooms that open onto it, because mixed whites are obvious and look like a mistake. Northwest winters are long and gray, and many kitchens here run on electric light for much of the day, so view samples of your cabinet and counter finishes under the actual lights before deciding.
What the Washington energy code expects
The codes in force as of October 2026 are the 2021 editions, including the 2021 Washington State Energy Code, Residential. For a remodel it says:
- New lighting must be high-efficacy. Section R503.1.4 states that new lighting systems that are part of an alteration must comply with section R404.1, and R404.1 requires all permanently installed lighting fixtures to contain only high-efficacy lighting sources. Kitchen appliance lighting fixtures are excluded.
- Small changes are exempt. An alteration that replaces less than 10 percent of the luminaires in a space is exempt, provided it does not increase the installed interior lighting power.
- Untouched parts stay as they are. Unaltered portions of the building are not required to comply.
Two points we could not confirm and that you should check. The code's numeric definition of "high-efficacy" sits in its definitions section; ask your electrician or lighting supplier to confirm that the specific fixtures you choose qualify. And the code's section on lighting controls (R404.2), which calls for a dimmer, an occupant sensor or a similar control on permanently installed interior fixtures, is written for new lighting systems; whether it is enforced on a kitchen alteration is a question for your permitting office. Since a layered plan already puts everything on dimmers, a well-designed kitchen normally satisfies it either way.
Washington's electrical rules also require additions and alterations to conform to the current code while letting existing lawful wiring continue unchanged. For kitchens, that includes arc-fault protection on new or modified 120-volt lighting and receptacle circuits. The circuit rules are explained in kitchen electrical code in Washington.
Why lighting is planned before drywall
Lighting is a rough-in trade. The cable, the fixture housings or boxes and the switch boxes are installed while studs and joists are exposed, then inspected. The Vancouver Municipal Code requires work to remain accessible and exposed for inspection until it is approved, so the ceiling cannot be closed before the rough electrical inspection passes. After drywall, moving one light means cutting, patching, texturing and repainting a ceiling.
That is why these decisions are needed earlier than most people expect:
- The final cabinet and island layout, which fixes where task light is needed.
- The fixture types, so the right housings and boxes go in.
- The number of switch zones and where each switch goes.
- Any low-voltage lighting, with its driver locations.
The inspection sequence is described in kitchen remodel inspections. If easier seeing is a priority for someone in the household, aging-in-place kitchen design covers glare and light levels.
Budgeting for lighting
JDI's published planning range for a full lighting redesign as a kitchen add-on is $2,000-$6,000, before sales tax. It is a planning range, not a quote; the number of fixtures, the condition of the existing wiring and how much ceiling is already open all move a project within it. JDI Construction draws the lighting with the cabinet layout so both are settled before rough-in. To talk through a plan for your kitchen, start at our Vancouver kitchen remodeling page.
Common questions
Do I need a permit to add recessed lights in my kitchen?
Yes. New lighting means new wiring, and in the City of Vancouver an electrical permit is required for all electrical work outside a short exempt list. That list covers replacing switches, lamp sockets and receptacles, not adding outlets or circuits. Outside city limits the permit comes from the Washington Department of Labor & Industries.
Can I swap a light fixture without a permit?
A like-for-like fixture swap is treated differently from new wiring. In areas where L&I issues electrical permits, its list of work that needs no permit includes like-in-kind replacement of single-family residential luminaires. Inside Vancouver the city's own exemption list applies, so confirm a fixture swap with the Permit Center at 360-487-7833.
Are smart switches worth it in a kitchen?
They are useful where several layers are switched from one location, since a single keypad can recall scenes such as cooking, dining and night. They are not required. If you want them, say so before rough-in, because some systems need a neutral wire at each switch box or deeper boxes.
What is a high CRI light and does it matter?
CRI, the color rendering index, describes how accurately a light source shows colors compared with daylight. In a kitchen it affects how food, wood tones and paint look. Fixtures rated 90 or higher are widely available and are worth asking for, particularly for under-cabinet and island lights.
Should I add a skylight or larger window for daylight?
Daylight is the most pleasant light a kitchen can have, but it is a bigger job than a fixture. Washington's energy code sets a maximum U-factor of 0.30 for replacement windows and 0.50 for skylights in Vancouver's climate zone, and enlarging an opening is structural work that needs a building permit in the city.
- WAC 51-11R-50300: Washington State Energy Code, Residential, alterations (R503)
- WAC 51-11R-40410: Washington State Energy Code, Residential, lighting equipment (R404.1)
- WAC 51-11R-40213: Washington State Energy Code, Residential, Table R402.1.3
- WAC 296-46B-010: Washington electrical rules, adopted NEC edition and existing installations
- Vancouver Municipal Code 17.16.040: electrical permits and exemptions
- Vancouver Municipal Code 17.08.140: inspections
- Washington L&I: City electrical permits and inspections
- National Kitchen & Bath Association: Kitchen Planning Guidelines with Access Standards
Checked October 2026. Rules, fees and programs change; confirm the current requirement with the agency before you rely on it.
Keep going
- Exploring · Appliances, sinks and fixtures in depthPendant and Island Lighting: Size, Spacing and HeightHow to size, space and hang pendant lights over a kitchen island: designer rules of thumb, linear fixtures, glare, bulbs, dimming and ceiling boxes.
- Exploring · Appliances, sinks and fixtures in depthUnder-Cabinet and Recessed Lighting: LED Types, Colour Temperature and CRIUnder-cabinet and recessed kitchen lighting explained: LED tape, bars and pucks, color temperature, CRI, trims, beam spread and dimmer compatibility.
- JDI ConstructionKitchen remodeling in Vancouver, WAOur kitchen remodeling service, recent projects and what to expect.
- Exploring · Plan your kitchenGas, Electric or Induction: Choosing a Range in WashingtonCompare gas, radiant electric and induction ranges for a Vancouver, WA kitchen: cooking, ventilation, wiring, gas piping and Washington gas rules today.
- Exploring · Plan your kitchenRange Hoods and Kitchen Ventilation: Sizing, Ducting and Makeup AirWhat Washington code requires of a kitchen range hood: cfm minimums, ducting to the outdoors, the 400 cfm makeup air rule, noise limits and island hoods.
- Exploring · Plan your kitchenKitchen Sinks, Faucets and Plumbing: What to Decide EarlyKitchen sink, faucet and plumbing decisions to make early in a Vancouver, WA remodel: sink types, disposals, the dishwasher air gap and moving a sink.